Monday, May 31, 2010

For Doors and Sardines: Sardine Dip

Think of the first night as the dress rehearsal. If we can just get through the play once tonight - for doors and sardines. That's what it's all about, doors and sardines. Getting on, getting off. Getting the sardines on, getting the sardines off. That's farce. That's - that's the theatre. That's life.
--Noises Off
For the last recipe (at least this time 'round) from the Cook Book Presented by The Fishwives of Charleston Oregon, I figured I really did have to feature fish. Well over half of the cookbook is dedicated to fish recipes, as well it should be; after all, how many cookbooks do you have on your shelves that kick off with an exhortation to call your Congressmen, and a prayer that they and the State Department will speak up for our country? "The Soviet Union and Japan pose a threat to the economy of our nation" is just not a phrase normally found next to a Brandy Alexander recipe, nor official resolutions from national professional federations. (If you're curious, the resolution recommends that the U.S. recognize a serious conservation problem, and kill all foreign fishery operations off the U.S. coast.)

It's certainly my only cookbook with such content. Moreover, I think it's my only cookbook with a sardine section. Not just a sardine recipe--a section! Sardine Submarine Sandwich. Sardine Rarebit. Marinated Sardines. Sardine Caesar Salad. Sardines with Sauce. Crispy Fried Sardines. Sardine 'n' Bacon Snacks. Sardine Cheese Toastwich. And, our recipe for today, Sardine Dip:
Sardine Dip

1 can sardines
1 pkg. cream cheese
1 tbsp. McKay's milk
2 tbsp. parsley, chopped
1 1/2 tbsp. lemon juice
2 tsp. grated onion
1 tsp. steak sauce
1 tsp. Worcestershire sauce
1/4 tsp. hot pepper sauce
Chopped parsley
Assorted chips, crackers or raw vegetables

Drain sardines and flake. Cream the cheese and milk. Add remaining ingredients except parsley and chips. Add sardines and mix thoroughly. Chill. Sprinkle with parsley. Serve with chips, crackers or vegetables.
I....I have no words. I don't think I ever had a sardine until sometime in the last decade, and even then, it's a stretch for this formerly-fish-adverse gal. And this is sardines mixed with dairy.

I've done smoked salmon spread, of course, and even tuna spread, so this shouldn't throw me so much. It just does. I can't say I think I'll ever make this (no, nor any of the other eight sardine recipes). Heck, I'm hard-pressed to think I'd ever follow the footnote advice on page 128: "For a quick snack use sardines, cracker and cheese." I'm fascinated. I'm appalled. I'm willing to hear how this recipe turns out...from someone else.

Let's close out our week with the Fishwives of Charleston with a bit from the foreward:
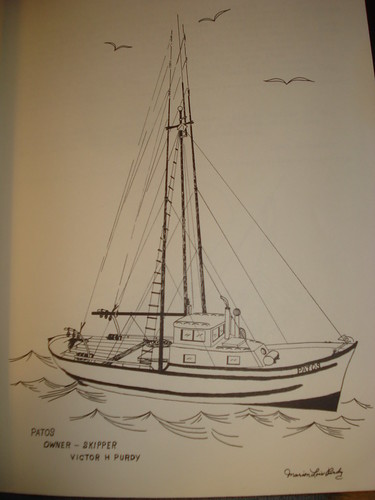
This is a unique cook book filled with memories and illustrated with pictures of some of our won fishing fleet.

When next you visit Charleston, stroll along the docks and you are sure to see some of the boats pictured in our cook book. We are proud of this cook book. It has taken the concentrated efforts of many Charleston area residents to compile it. Many of them are no members of the fishing industry, but have joined with us in this endeavor to raise funds for what they also believe is a good cause.

--The Editor, Kay Wells

Sunday, May 30, 2010

Triple Underline: Brownies

It's Memorial Day weekend, the unofficial start to summer. I suspect many of you have cook out or picnic plans today or tomorrow. There might be a parade. Here's a good take-along, from the Cook Book Presented by The Fishwives of Charleston Oregon:
Brownies

1/2 c. McKay's margarine
1 c. sugar
2 eggs, beaten
3/4 c. McKay's flour, sifted
1/4 tsp. salt
1/2 tsp. baking powder
2 sq. chocolate, melted
1 c. nuts, chopped
1 tsp. vanilla

Cream margarine and sugar. Add well-beaten eggs, sift dry ingredients and add to creamed mixture. Add the chocolate, walnuts and vanilla. Pour into a greased pan. Bake at 350 for 25 to 30 minutes. Cool and cut into squares.

--Karen Landers
Really, no call to ever use a brownie mix. Really. It is as easy as Karen Landers makes it sound. Actually, it's easier. And you can substitute like made with brownies. Change up your chocolate source. Omit nuts. Add caramel. Add coconut. And there's hardly any day that can't be made better by a brownie (some day, I'll wax lyrical about my triple chocolate, caffeinated brownies from college dorm days...).

What's really special about this recipe is, again, the notes in the margin:
DELICIOUS You ought to try, Jan. --JB
"JB" are the initials of the woman who gave my mom this cookbook. JB really, really, really liked this recipe. Really, really, really. I know this because, dang, the woman triple-underlined the word "delicious" (and used all caps). It again makes me despair of the paucity of HTML code; how to indicate such enthusiasm?

It'd have to be something like this:
DELICIOUS
Perhaps blinking. And scrolling. With little sparkles.

Friday, May 28, 2010

Potluck Pleasers: 7 Layer Cookie, and Grasshopper Pie

I was a child of the '70s, and I love me some potluck. So, today, we'll look at two recipes from the Cook Book Presented by The Fishwives of Charleston Oregon that I absolutely guarantee will be welcome at a potluck in your future.
7 Layer Cookie

1 stick McKay's margarine
1 c. graham cracker
1 c. coconut
1 pkg. chocolate chips
1 pkg. butterscotch chips
1 c. eagle brand milk
1 1/2 c. chopped nuts

In a cake pan melt the butter. Then sprinkle the graham cracker crumbs over the butter. Sprinkle each of the ingred. in succession over the proceeding one. Bake at 350 for 30 min. Cool and cut.

--Flora Ann Anderson
Is this the first bar recipe for Take One Cookbook...? If so, what a bar to kick us off! It's easy as sin to put together, and, good golly, but it's tasty. I love all the textures, the gooeyness, the crumblies, the chewy coconut. As for your pan, I'd say break out your trusty 9x13, but if you want to try it in a 9x9 or an 8x8, I won't tell you no. You'll just get thicker bars (and I think we all appreciate a good thick bar, no?).

I've mentioned before that I was a margarine girl for the first half of my life. So, it tickles me that Flora Ann calls for margarine in the ingredient list, but only refers to butter in the instructions. I'll admit it: I called margarine butter. And, though this goes against everything I've said before, I really think that margarine is the way to go for this recipe.

Maybe it's just my childhood taste buds taking over. Perhaps I'll do a cook-off, with one pan of margarine 7 Layers and one of butter. My childhood taste bud, having thoroughly commandeered this post, also dictate the next recipe choice:
Grasshopper Pie

1 1/4 c. choc. wafers, crushed
1/2 c. sugar
3 tbsp. McKay's marg., melted
1 1/2 tsp. gelatin, unflavored
6 tbsp. cold water
1 McKay's egg, sep., beaten
1 c. creme 'de menthe
1/2 c. creme 'de cocoa
1 2 1/8 oz. pkg. whipped topping mix

Heat oven to 450 F. Combine the wafers, margarine and sugar. Press the crumbs into the bottom and sides of a well-buttered 9 inch pie plate. Put in oven. Bake 2 to 3 min. Cool. Combine the gelatin and water in a small saucepan. Place over low heat. Stir until dissolved. Combine the other half of sugar and egg yolk in a mixing bowl. Add the dissolved gelatin, creme 'de menthe and creme 'de cocoa. Chill. Prepaer the whipped topping mix. Fold into the gelatin mixture. Pour into crust. Chill 3 to 4 hours. May be topped with additional whipped topping.

--Viola Nappier
Ooooh, the green and black and creamy and minty icebox pie! Grasshopper Pie and Impossible Pie were my two favorite non-holiday pies for a good long time. I'm not sure about the reasoning for the apostrophes before "de" in the liquors, but this pie has a cup and a half of liquor, so I'm not going to nitpick.

If you were pressed for time, or find yourself with a better stocked bar than pantry or baking aisle, you could use a pre-made chocolate crumb crust. These don't taste as good as homemade, but they are tidy, and they come in their own pie tin, which means you don't have to think about how to get your tin on your way from the potluck.

Thursday, May 27, 2010

Call and Response: Zucchini Bread

I always try to pick a theme for the recipes here. Granted, sometimes the theme is just "what were they thinking?" but there's always an attempt at theme-ing. Usually, during the course of a week, the theme takes a few unexpected twists. I thought that the Cook Book Presented by The Fishwives of Charleston Oregon would be all about the boats and the scrap fish recipes of the southern Oregon Coast. Then, I settled in on baking. But here we are, and it seems pretty clear that the real theme is "My Mom."

Today, we start off with the Fishwives' Zucchini Bread.
Zucchini Bread

3 eggs
1 c. McKay's oil
2 c. sugar
2 c. peeled, grated zucchine
2 tsp. vanilla

In a separate bowl mix:

3c. McKay's flour
1/4 tsp. baking powder
1 tsp. soda
1 tsp. salt
3 tsp. cinnamon
1/2 c. walnuts

Beat the eggs until light and foamy. Add next four ingredients; mix lightly but well. Add flour mixture and blend. Add nuts. Divide batter in two greased loaf pans, and bake 325 for 1 hr. or until done. Remove from pan at once and cool on rack. May be frozen for future uses, and it is delicious.

--Kay Wells
--Betty Brown
I wonder what Kay and Betty's story is, why they are both credited with this recipe. Are they sisters, sharing a family favorite? Were they rivals, each claiming the superior recipe, when really they were identical? I also wonder if everyone knows when a quick bread like this is done, as "or until done" is a bit vague. Here's my take: use the toothpick/broomstraw/knife method--insert the pokey tool of your choice into the cake/bread, pull it out, and see if there's any wet stuff clinging to the pokey tool. If so, let it cook a bit longer. If not, it's done. Now we're all on the same page.

Okay, with one detour: yes, I've been known to use an actual broomstraw to test my baked goods. If it disturbs you, well, more baked goods for me. You're safe for right now, though, as our broom didn't survive the Snowpocalypse we had this winter. Anyway.

So, what did Momma have to say about Kay & Betty's Zucchini Bread? Nothing directly--she didn't annotate the page.

She did, however, slide in a slip of paper, upon which she wrote:
Zucchini Bread

1 hr. at 350°

5 eggs
1 1/2 oil
3 c sugar
5 tsp vanilla
3 c zucchini
4 1/2 c flour
1 1/2 tsp salt
5 tsp cinnamon
1 1/2 c soda
3/4 tsp Baking powder
I've got to assume Mom meant 1 1/2 cups of oil, and 1 1/2 teaspoons baking soda; it doesn't make any sense otherwise. For assembly, I'd follow the order listed by Kay & Betty. But, oh, it makes me smile to think of Mom rewriting this.

Momma had a recipe box. There's no reason that she would have to put a favored recipe into a cookbook. So, she chose to put it here, between pages 180 and 181. Take that, Kay & Betty.

I have only the vaguest memories of the kitchen in Coos Bay. Most of those are probably false, just the mind putting in placeholders of imagined kitchens and homes; we left Coos Bay when I was 3, after all. But I remember Momma baking. It would be grey and damp and cool out--it was Coos Bay--and she had two little ones under foot. I think I remember where the loaf pans were stored. I think I remember where the oven was, opposite the sink. I remember Don Quixote (our cat) looking in through the screen door from the back stoop. And once again, the theme takes a turn, and it becomes more about the shadowy memories of childhood.

What will it be come tomorrow?

Wednesday, May 26, 2010

Mom's Emphasis: Dump Cake and Oatmeal Cake

I love thumbing through a cookbook and finding that the cooks before me have annotated the recipes. Still, it is always a little bit of a shock to see my mother's handwriting in the margins. We live 3000 miles apart, and yet, there's her handwriting, as nun-trained as ever, telling me what I should know. In the Cook Book Presented by The Fishwives of Charleston Oregon, her guidance marches across the baking section like "JMJ" used to march across the corners of her exam papers. (Nun-trained, I tell you.) Today's recipes are both on the same page, both with Momma-notes, and both some variety of "good."

Let's start with what will come to be known as "damned with faint praise."
Dump Cake

1 1-lb. can crushed pineapple
1 1-lb. can cherry pie filling
1 pkg. white cake mix
1 cube McKay's margarine
1 c. chopped nuts

Place entire can of pineapple and pie filling in square baking pan. Sprinkle dry cake mix evenly over top. Cut cub of margarine in small pieces over the top of cake mixture. Sprinkle nuts over all. Bake 45 min. at 350 or until done.

--Dorothy Kerns
Momma's comment: "Good but Very Rich." This would be high praise, indeed, if only it weren't for...
Oatmeal Cake

1 c. oatmeal
1 1/3 c. boiling water
1 c. white sugar
1 c. brown sugar
1 c. McKay's margarine
2 eggs
1 1/3 c. McKay's flour
1 tsp. soda
1 tsp. baking powder
1 tsp. cinnamon
1/2 tsp. salt
1 tsp. vanilla

Add oatmeal to boiling water; let stand for 20 minutes. Mix sugars and add to margarine, cream. Add eggs, beat after each addition. Add oatmeal to creamed mixture, sift dry ingredients; add to creamed mix and stir just enough to blend. Add vanilla, pour into greased and floured 9x12 pan. Bake at 350 for 35 to 40 minutes.

Topping

1 c. brown sugar
4 tbsp. McKay's margarine
1 c. coconut
1/3 c. cream or evap. milk
1/2 c. chopped nutmeats

Cream margarine and sugar, add coconut, moistened with cream. Spread on top of warm cake, sprinkle nuts on topping. Return to oven under broiler until topping bubbles. Serve warm.

--Miriam Landers
My mom would have you know that this is "Very GOOD" (if only HTML had a way to double-underline...the "GOOD" is double underlined) and that it "STAYS MOIST."

So, sorry there, Dump Cake. You only merit a single-underline, and that's under "rich" not "good." You are nowhere near as Mom-pleasing as the Oatmeal Cake (even though I balk at the 9x12 pan, when a 9x13 would be the logical, wholesome, wonderful choice).

Ingredients notes: Yes, I grew up using margarine for everything, butter for nothing. Feel free to substitute butter; I know I would. For the oatmeal, use Quaker Instant (or other instant); the illustrators helpfully drew the cannister of oatmeal on the page, so we're pretty safe assuming that we needn't find some coarse-ground groats.

Tuesday, May 25, 2010

"Very Good": Lemon Jell-o Cake

I mentioned yesterday that I hadn't realized how many of my family's recipes came from the Cook Book Presented by The Fishwives of Charleston Oregon, and then I posted a recipe that I'd never tasted. Time to remedy that, boys and girls!

My older sister, Kelly, is a bit of a picky eater (okay, that's an understatement, but she's slowly becoming more of a foodie). There's one food, though, that she's always, always loved: Lemon Jell-o Cake. And, we've the Fishwives to thank for introducing us to what would be come the birthday cake in our family.

When I say "Lemon Jell-o Cake," most people think I mean some sort of poke cake, where you have red dribbles of Jell-o going into a white cake. Now, I love me some poke cake, I do. But Lemon Jell-o Cake is a different beastie altogether.
Lemon Jell-o Cake

1 pkg. lemon jello
1 pkg. lemon cake mix
4 eggs
3/4 c. McKay's oil

Icing:
1 c. powered sugar
3 tbsp. lemon concentrate

Dissolve lemon jello in 1 c. boiling water in mixing bowl. Cool, add the cake mix, eggs and oil, beat well, and bake at 350 for 40 min. While baking make icing, mix sugar and concentrate thoroughly. After removing the cake, stick with fork several times and spread icing on while hot. Will glaze.

--Elsie McDonald
Momma has written in the margin: "Very GOOD." "Good" is underlined twice; it really is that tasty.

The Jell-o keeps the cake moist for a long, long time. It does, however, also start setting up if you're not quick about things. So, don't think about using this as a cupcake recipe unless you're blessed with an oven (or set of ovens) that is big enough to do all the cupcakes at once. The batter won't wait 15 minutes.

So, if not in cupcake tins...in what?

That's right.

You know what I'm going to say: A 9x13 pan.

It's a classic. Ideally, you'll use a clear Pyrex 9x13, but whatever you have will work. If you want to fancy it up, the recipe neatly fills one Bundt cake pan; you'll just have to adjust your cooking time.

I've picked a theme for this week with the Fishwives: baked goods. We'll look at the fish dishes later on, but for now, it's 1970s classic cakes all the time.

Monday, May 24, 2010

Cook Book Presented by The Fishwives of Charleston Oregon; Good Cake

When I was a very small creature, my family moved to Coos Bay, Oregon. My dad was a forester for the state, my mom was raising my sister and I. We lived on a slough. We had a really dumb dog, an Irish setter named Millicoma (after the river & forest in southern Oregon) (and, no, it is nothing like "melanoma") who would eat dying fish out of the slough. There was a bramble patch, and I would hack at it with a hoe while making up songs in the grey gloomy happiness of youth. We left Coos Bay for more temperate climes when I was just a smidge over three years old, so my memories are piecemeal, fragmented, and not to be trusted. Aren't all our childhood memories?

When I was home in Oregon a few years back, my mother gave me her copy of
Cook Book Presented by The Fishwives of Charleston Oregon, published by the Commercial Fishermen's Wives Association of the Port of Coos Bay in 1972. Mom came by her copy in '73, a gift from a friend at St. Monica's. I remember looking through the book and loving the hand-drawn ads, and the drawings of all the fishing boats comprising Charleston's fleet.

What I didn't remember or know was just how much this cookbook guided my meals growing up. So many recipes that I think of as "our" recipes, "family" recipes are all from the fishwives. That being said, there's no way I'll ever limit myself to a mere seven recipes from this book. My love for it seemed a good way to kick this blog back into gear.
Good Cake

1/2 c. McKay's margarine
1 c. sugar
1 1/2 c. McKay's flour
2 tsp. baking powder
2 eggs or whites of 4
Flavor to suit yourself
GREAT GRANDMOTHERS

Mix well, bake at 350 till done. This recipe comes from an old old cook book. I double the recipe and then make 3 9-inch layers, very good frosted with 7 minute icing topped with coconut.

--Pat Loomis
McKay's is still open, so if you find yourself in Coos Bay, and you want to bake a cake, by all means, use the specified brand. Otherwise, embrace the fact that McKay's was a big advertiser in the cookbook, and so you can probably substitute your favorite brands in good health.

I'm not at all sure why "GREAT GRANDMOTHERS" are a part of the recipe, or, at least, why it's in the recipe where it is. "Great Grandmother's Good Cake" would make a good title, and is probably what this receipt is really about.

For the flavor, you could go basic vanilla, or (if you're using coconut) how about some rum?

I know you're shocked; I'm suggesting booze.

I do not think I ever ate "Good Cake." See, there's a little hand-written note at the end of the recipe...
Bake 30 min--It falls if oven door is opened. Not to good. JB
"JB" is the woman who gave Momma this cookbook. All spelling is hers.

Patos, Owner-Skipper Victor H Purdy


As we explore Fishwives of Charleston, I'll post some of the (really quite cool) art work. This cookbook was a labor of love, and feels very different from the more formulaic fundraiser cookbooks you find at jumble sales. There's a sense of time, a sense of the authors, and boy golly, a sense of place.

So. Many. Fish. Recipes.

But that can wait until tomorrow.

Friday, October 9, 2009

She's safe!

Our friend Lisa's daughter has contacted family. Rachel is safe. We'll post more when Lisa has had more time to process everything. Thank you all so much for your concern!

- Kelly
(Wendy's sister)

Rachel Lee, My Friend's Daughter, Is Missing


I know this isn't a cookbook post. I hope you'll forgive me. But, this is not some random missing kid post that's probably out of date. No. This is my friend Lisa's daughter. She's been missing since Wednesday evening. Please, especially if you're in Oregon, keep an eye out, get the word out, pray if you're a praying sort.

Rachel Lee is missing.

Sunday, September 6, 2009

By "Cheese" We Mean "Tillamook": Cheddar Cheese Puffs With A Surprise

The Clackamas County Fair is my fair, as I've already waxed quasi-lyrically about, and so you might think that I'd logically take the Clackamas County Fair recipe from The County Fair Cookbook to cap off a week of fair recipes. Well... I would...but...

I'll just say it. I'm sure Mabel Johnson is a lovely woman, but her recipe for sweet and sour kidney beans just doesn't float my blogging boat. It's not even a vegetarian recipe, so I can't be guilted into putting it up to balance out the ham and Spam. I love you Clackamas County, but a little bird tells me the Extension volunteers might put together a cookbook for a fundraiser at some point, and so I'll wait until then to do my proper homegirl salute. But, there should be something from Oregon...

The Tillamook County Fair is held in Tillamook, Oregon, the second week of August -- Wednesday through Saturday. They are home to the only Pig-N-Ford races in the nation, and if you don't know what those are, hop on over to that link and check 'em out. Tillamook, it seems, is more than just beautiful sea views and the world's best darned cheese.

The cheese really is amazing, and now you can get it in the grocery store nearly anywhere in the States, so there's no reason to use anything other than proper Tillamook when you make this recipe:
Cheddar Cheese Puffs With A Surprise
Mildred Davy's late husband, John, worked for many years at the Tillamook County creamery. Their excellent cheddar appeared frequently on the Davy family table. If you can't get Tillamook cheese, use any fine cheddar.

Makes 48 puffs

2 cups grated sharp Tillamook, or other cheddar
8 tablespoons (1 stick) butter, at room temperature
1 cup sifted flour
1/2 teaspoon salt
1/2 teaspoon paprika
48 small green stuffed olives, well drained

• Preheat the oven to 400 degrees.
1. Blend the grated cheese and butter. Stir in the flour, salt and paprika. (This can all be done in a food processor equipped with the metal blade.)
2. Mold 1 teaspoon of the mixture around each olive. Chill the puffs until firm, about 30 minutes. Arrange the puffs on ungreased baking sheets.
3. Bake for 15 minutes or until browned. (You can also freeze the puffs, well wrapped, for about 10 days. Bake them, still frozen, until browned.)
Aaaah, cheesy olivey salty goodness. I'd say that 48 puffs serve 4 rabid happy hour folks. I know that a proper cocktail party guide might suggest that each person will have 2-4 olives, but c'mon. There's Tillamook. There's olives. There's heat, blending them together. You're going to eat more than 4.

These go particularly well in the time before the turkey is done on Thanksgiving. You can heat them in small batches in your toaster oven, so that you're not disturbing the rolls, yams, Brussels sprouts, or bird.

You can choose what kind of stuffing you want in your olives. The classic pimento is fine, but if you want to grab the garlic- or almond- or even blue-cheese-stuffed ones from the fancy cocktail section of your favorite store, I won't say no.

Do get Tillamook, though. Chefly Husband came up with a great metaphor for why he, the Wisconsin Boy, could still eat Tillamook without the cheese police coming after him. See, evidently, the Wisconsin cheese is like the very best blended whiskey. Tillamook? Well, Tillamook is single malt Scotch. It's similar in composition, but a completely different beast. Get the single malt of cheese; get Tillamook.

And that's it for The County Fair Cookbook. Next up, perhaps an older book, or perhaps something focusing on a particular country's cuisine...

Friday, September 4, 2009

Super Easy Preserving: Pickled Cherries

Oh, who am I kidding? I'm glad that I posted Hot Spicy Candy, but I just can't stop thinking about these cherries... The County Fair Cookbook doesn't specifically link them to a county fair (ooo, the scandal!), but the nearest one it does talk about is the Long Island Fair in Old Bethpage, New York. According to the Fair's website, the fair's got a good blend of history and activities:
The Long Island Fair is the oldest continuously operated fair in the country having begun in 1842, first in farmers’ fields or empty lots, then in Mineola at the present site of the County Court House complex, and finally moving to Old Bethpage Village in 1970 (History). The Fair features rides, amusements, entertainment for young and old, and agricultural and horticultural competition for cash prizes common to Long Island a century ago and is the only New York State sanctioned agricultural and horticultural fair for Long Island. Prize competition is open to anyone not only in vegetables, fruits and flowers but also for baking, crafts, hobbies and agricultural skills – cross cut sawing and corn husking.
Rock on, Long Island agriculture! The fair runs for eight days in mid-October, so you've got time to plan your trip up to (or down to, or over to, I suppose) Old Bethpage. Old Bethpage: It's closer to civilization than Smithtown. Okay, so odds are the Chamber of Commerce isn't going to hire me to write their new tagline...and really, you have to go even further out on the island to get to the heritage of the next recipe.

Wickham's Fruit Farm is over 200 acres of farmy goodness next to Peconic Bay in Cutchogue. The Wickham family has been farming those acres for about three hundred years. This feels like a good time to say that the first time I came to the East Coast, I was in a cab in Boston, and said to the cabbie, "Today, I saw things that are older than my state!" The cabbie replied, "Honey, in Boston, there are things older than dirt." That's how I feel about saying one family's been doing anything for 300 years in one spot in this country, especially when that family has a very non-native last name. Anyway. The Wickham story is pretty darned compelling, but what you really need to know is this: they make cider, and they make donuts, and I'm betting that means they make...

...cider donuts...

Cider donuts are one of the best things in this crazy world of ours, and it's fall now, so I suggest you hightail it to the nearest place you can, and get yourself some.

But this is a blog about cookbooks and recipes, so let's look at one of the Wickham family recipes.
Wickham Family Pickled Cherries
"No need to process these cherries in a water bath," says Mrs. Wickham. "They'll keep all winter on the shelf. We serve them as an accompaniment to poultry or meat."

Sour cherries (any amount)
Cider vinegar to cover
Sugar

1. Wash, stem and pit the cherries. Place them in a bowl and cover with cider vinegar. Let stand overnight.
2. Pour off and discard the vinegar. Measure the cherries and add an equal amount of sugar to them. Let stand until the sugar dissolves, stirring occasionally. Put the cherries in very clean jars and cover. Store in a cool dark place.
Look at that... preserving without processing! Putting up fruit doesn't get much easier than this, folks.

In step one, I'd suggest covering the bowl with cheesecloth or cling film, and leaving the bowl out on the counter -- not in the fridge. If you're wondering how to get "very clean jars," I'd say that those of you with dishwashers are going to need to run the washer on hot, and let the washer do the drying, too -- don't let 'em drip dry. Heat is your friend for sanitation purposes. For those of you more like, well, me, with only a sink and a dish drainer to help you out, wash the jars well in hot, soapy water. Let dry. Then, sanitize the buggers. I know, I know, part of the charm of this recipe is that you're not processing the jar in a water bath, but sanitizing is your friend, and a big ol' pot of boiling water goes a long way towards ensuring food safety. If you just can't bring yourself to do it with boiling water, or you have any inklings that your jar can't take the heat, use bleach -- 1 tablespoon per gallon of water. Soak for 20 minutes, drain. Let air dry. If you want to rinse the jar after that, do so only with boiled water.

Yes, I'm the sister of an Extension employee. Food safety is important. Don't muck about with bacteria.

And, it's STILL the easiest darned preserving method I've seen, other than "put fruit and booze in a jar, let sit for months, then drink." This one even has the benefit of creating food, not, well, booze, so it's ... at least different.

Sour cherries can be hard to find; you can use frozen, I guess, but better to find an orchard and pick your own when you can. When measuring the cherries and sugar, measure by weight, not volume, if at all possible. As it's not baking, I won't yell at you if you don't have a scale, and have to go the volume route.

Thursday, September 3, 2009

Exiled No More: Hot Spicy Candy

The Midatlantic section of The County Fair Cookbook has more than its fair share of interesting-looking recipes. It made selecting just one very difficult. Finally, I got it narrowed down to Wickham Family Pickled Cherries, or Hot Spicy Candy. The candy won out, mostly because the recipe is longer, and, well, I'm a fool for candy, and the method seems less prone to error than others. If you've a hankering for easy preserving of sour cherries, however, drop a comment, and I'll post the cherries.

The Sussex County Farm & Horse Show takes place the first week of August, most years, in Augusta, New Jersey. It's one of the larger fairs in the Northeast, evidently. Jane Brodhecker raises lambs, and though I love me some lamb, it's her candy recipe that makes me go "ooo."
Hot Spicy Candy
"The recipe comes from my Indiana grandmother," says Jane. "We made this candy with our children, and now they make it with theirs. Before Christmas everybody comes to the farm and we make batches together in several flavors. We use red coloring for cinnamon candy, black for anise, and purple for spearmint. Then we mix them and put them in airtight containers for gifts. The procedure sounds complicated, but making this candy is really simple." Flavored oils -- cinnamon, anise, wintergreen and others -- can be found at many pharmacies and sometimes at specialty food shops. Intense fruit flavorings are good, too. Paste coloring agents are sold at bakers' supplies stores and craft shops.

Makes about 4 cups

3 1/4 cups granulated sugar
1 1/2 cups light corn syrup
1 cup water
Paste or liquid pure food coloring
1 dram (scant teaspoon) oil of cinnamon, clove or peppermint, or fruit flavoring
2 pounds confectioners' sugar (see Note

1. Place the sugar, syrup and water in a large saucepan. Bring slowly to the boil, with a candy thermometer attached to the side of the pan. Heat the mixture to exactly 290 degrees. (This will take 15 to 20 minutes.) Higher, the candy sets too hard; short of 290, it won't set up. Remove from the heat and add the desired color. Paste colors are intense; a dab on a toothpick should give a deep color. Be careful with liquid colors -- too much may dilute the candy mixture and impede setting.
2. Stir in the oil flavoring. Stand back! The mixture steams up and releases strong fumes.
3. Have ready 3 jelly roll pans on which you have places a 3/4-inch-thick fluffy layer of confectioners' sugar. With a finger, trace a large spiral trough in each pan.
4. Carefully pour the liquid into the troughs -- the little walls of confectioners' sugar keep it from spreading. When the candy has hardened and is cool enough to touch -- a matter of minutes -- take scissors and snip it into short pieces, or snap off pieces with your fingers. Roll them in the sugar. Sealed in containers, the candy lasts for months.
NOTE: You can reuse the confectioners' sugar. Between candy-making bouts, store the sugar in a self-sealing plastic bag.
...damn, that DOES sound easy! And far less apt to leave you with hard candy that tastes either of butter or vegetable oil, which always happens to me when I try to make lollipops and I have to grease the molds...

I wonder a bit at the order of the steps, and suggest that you make sure you do the prep for step 3 before you get anything else going. At least do it well before you've got a pot of fully molten sugar and oil ready.

I love old fashioned candy flavors. When I was in Salem, Massachusetts, I practically ran to Ye Olde Pepper Candy Companie to stock up on anise and clove candies. I'll admit: most people I know don't care for anise or clove candy. Poor souls! The spiciness combines with the sweet? Delightful! So much more interesting than sweet-on-sweet. Then again, I also love licorice (especially salted licorice), and absinthe, so I may just be a weirdo. And fennel! Love fennel.

After my buttered lollies failures, I'd pretty much sworn off hard candy making. The sugar trough method may bring me back from my candy land exile.

Wednesday, September 2, 2009

You Knew It Had To Happen: Midwest Spam Salad

At this point, none of you will be surprised to hear that when I saw this recipe in The County Fair Cookbook, I simply had to post it. C'mon... it's got both Miracle Whip and Spam. SPAM!!! I love Spam with an unholy passion. It's trashy as all get out, but it's so darned tasty.

This recipe comes to us from the Stephenson County Fair, which is held every July -- so you're out of luck for this year.
Midwest Spam Salad
Rosann DeVoe entered her dish in the Stephenson County Fair SPAM contest in Illinois.

Makes 12 servings

1 cup salad dressing (such as Miracle Whip)
1 tablespoon prepared mustard
3 tablespoons sugar
1/4 teaspoon pepper
2 1/2 pounds frozen green peas, thawed and drained
1 cup diced mild cheddar cheese
1/2 cup chopped bread and butter pickles
1/2 cup finely chopped onion
3 hard-boiled eggs, chopped
1 (12-ounce) can low-salt SPAM, diced
Lettuce leaves, if desired

• In a large bowl, combine the dressing, mustard, sugar and pepper. Add the peas, cheese, pickles and onion. Toss gently to mix. Add the eggs and SPAM and stir to combine. Cover and refrigerate until chilled, at least 2 hours. Serve on lettuce leaves if desired.
It's so darned hard to type without including serial commas. Serial commas are good! Serial commas make sense! Serial commas are not to be found in this cookbook.

I find it hilarious that they specify the low-salt Spam. Why not Spam® Garlic? Or Spam® Oven Roasted Turkey? (Yes, that's a real product.) Or, really, Spam® Bacon, for the love of all things bacon-y? I say choose whichever Spam product you have on hand, and embrace it. Whatever you choose, the Miracle Whip and peas will make the salad amazingly homey and not just a little 1970s.

I don't know the last time I had a mild cheddar. I tend to go for the extra-sharp vintage cheddars that have some real bite to them. Say, for example, something from Tillamook, which is the cheese to beat all cheeses.

Tuesday, September 1, 2009

Sheboygan Is Fun To Say: Ethel Holbrook's Ham Loaf

So far, we've had a savory pie, a starchy pudding, and a jammy cake from The County Fair Cookbook. We've looked at Nevada, Maine, and Kentucky. What should we hit today?

...how about Sheboygan, Wisconsin? Just about 50 miles north of where Chefly Husband grew up, the Sheboygan County Fair isn't in Sheboygan proper, but rather in nearby Plymouth, WI. It's held Labor Day weekend, for five days, which means that this year, it starts this Thursday. If you're anywhere near, you can go to an ecumenical church service on Sunday, or a square dance, or you can just indulge in bratwurst done the right way.

The right way, of course, is to boil them in beer with onions, and then grill 'em. If you've never had a brat done right and done by a citizen of the Badger State, you're missing out, I can tell you that for free. They know their processed meat in Wisconsin. With that in mind, let's look at some processed meat!
Ethel Holbrook's Ham Loaf
"It's really my aunt's recipe," says Ethel.

Serves 6 to 8

1 egg
1 1/2 cups milk
3 slices white bread
1 pound ground beef
3/4 pound ground ham
3/4 pound ground pork
1 tablespoon salt, or to taste
Freshly ground pepper to taste
1/2 cup packed brown sugar
1 teaspoon dried mustard
1/2 cup pineapple juice

• Preheat the oven to 375 degrees.
1. Beat the egg and milk together; soak the bread in the mixture for 10 minutes or longer.
2. Combine the meats with the soaked bread, salt and pepper, mixing them well, but gently so as not to compress the meat. Put into a greased 9 x 5 x 3-inch loaf pan.
3. Make the topping. Mix the brown sugar, mustard and pineapple juice together. Spread this paste over the loaf. Bake 1 1/2 to 2 hours, until the top is brown and bubbling.
Is it just me, or is it delightful to remember that "meat loaf" can use all sorts of meats, not just those coming from a cow? Odds are, you're not going to be able to find pre-ground ham at your grocery store. If you have the means, grind it at home; if not, chop it up in a food processor, or mince it really, really, really fine. Knife work is very therapeutic. Take out your stress on some ham!

Perhaps the first time you make this, you'll want to try it in a loaf pan. However, I never, ever make meat loaf in a loaf pan. Ever. I like to cook it on a rack on a jelly roll pan, so that fat flows out more easily, and more of the surface gets brown and crisp and lovely. I'd also suggest that if you're going to bother to make meat loaf, especially one that requires you to do your own grinding, that you just double your batch, and make two.

There's nothing finer in this life than a meat loaf sandwich.

Since we've pig two ways, I'd be tempted to either line the pan (if using) with bacon strips, or top the loaves with bacon strips before saucing them up. Your mileage may vary, but when it comes to options, Take One Cookbook is very much in favor of exercising the bacon option early and often. Everything is better wrapped in bacon.

Now, you may take note of the two "to tastes" in the ingredients list, as well as the raw meat. How, you might wonder, are you supposed to do anything "to taste" if the frickin' meat you're seasoning is raw? Unless you want nasty evil disease, it won't "taste" until it's cooked!

...well, yeah. You're solution's right there. Take a pinch of the meat mixture, about the size of a filbert/hazelnut, smoosh it down into a wee patty, and fry it up in a hot pan on your stove. Then, taste it. Is it properly seasoned? If not, adjust. If so, onward! If you've exercised the bacon option, remember that it will likely bring a lot of salt to your mix, so don't over salt. If you do over salt, and you catch it in the tasting stage, add more stuff that isn't salt. More meat. More filler, if you must. Adjust, retest, retaste.

Have I waxed lyrical about my love of cheesy pineapple/brown sugar/ham pairings yet? Suffice to say, I love 'em, and will have to remember to take out one of the Trader Vic's recipe booklets at some point here. I'm pleased to see them come up in this dish, and would suggest that a pinch of ground cloves would be a welcome addition, based on how I spice up my p/bs/h dishes.

I don't want the vegetarians and anti-pig-eating folk to go away from this post empty handed, so I'll say this:

It's terribly fun to say "Sheboygan." Sheboygan, Shebogan, Sheboygan!

Monday, August 31, 2009

Listen To Your Big Sister: Kentucky Jam Cake

I take my cues from my big sister. Really, little sisters are advised to do that whenever possible -- big sisters being notoriously nasty and wicked things. In this case, however, I think the nasty wicked Kelly can be forgiven, because she said "Southern" and "Dessert" for today's post. So come along to Marion County Country Ham Days in Lebanon, Kentucky! For two days in late September, you can celebrate the local products, including, of course, ham, ham, and more ham. The County Fair Cookbook kicks off it's coverage with Mrs. Moraja's Country Ham Stuffed With Greens, which sounds delicious but doesn't suit my big sister's request. Let me know if you need to know how to stuff a country ham like Mrs. Moraja, and we could get a bonus post up. Until then, "Southern!" "Dessert!"
Kentucky Jam Cake
Jam cakes are a Kentucky tradition. Obviously, this is a grand cake for a special occasion.

Makes 1 large (4-layer) cake

3 1/2 cups all-purpose flour
1/2 teaspoon salt
1 teaspoon ground allspice
1 teaspoon freshly grated nutmeg
1 teaspoon ground cloves
1 cup blackberry jam
1 cup strawberry jam
1 cup peach preserves
1/2 pound (2 sticks) unsalted butter, softened
2 1/2 cups sugar
6 egg yolks, lightly beaten
1 cup buttermilk
1 1/2 teaspoons baking soda
2/3 cup seedless raisins
1 cup chopped pecans
6 egg whites
Caramel icing (opposite page)

• Preheat the oven to 350 degrees.
1. Prepare four 8-inch cake pans: cut 4 rounds of parchment paper to fit the bottoms of the pans. Butter the pans liberally and position the parchment liners.
2. Sift together the flour, salt, allspice, nutmeg and cloves. Set aside. Push the blackberry and strawberry jams and peach preserves through a sieve into a bowl. Set aside.
3. In the large bowl of a heavy-duty mixer, cream the butter and sugar together until light and fluffy. Add the egg yolks and combine well.
4. Put the buttermilk in a 2-cup measure and stir in the baking soda.
5. With the mixer on low speed, add the flour and buttermilk mixtures alternately, beginning and ending with flour. Beat until batter is smooth. Stir in the jams, raisins and nuts.
6. Beat the egg whites until they form stiff, unwavering peaks. Scoop the whites over the batter and gently fold them in with a rubber spatula. Pour the batter into the baking pans, dividing it evenly and smoothing the tops with a spatula.
7. Bake in the middle of the oven 30 to 35 minutes, or until a toothpick inserted in the center comes out clean. Let cool 10 minutes on wire racks, then turn out on racks to cool completely. When completely cool, frost the cake with caramel icing.
Really, when I saw a recipe for a 4-layer cake, with three different kinds of jam, I was sure there'd be a different jam between each layer. Color me completely wrong! I was also going to wax lyrical about the absolute best blackberry jam in the world, and how you should use only that (but you can't, because my mom used to make it, and doesn't anymore), but then I grew to understand that all the jams are being combined.

Now, I like mixed fruit jams and jellies. (This is where I'd include a reference to being too tired and punchy in the Tastee Diner during college, and really raunchy things we used to say about mixed fruit jelly were I not so very, very tasteful.) I do. But I'm not taking the very best homemade anything and mixing it up willy nilly. So, use that which you have, as long as it passes muster when you eat it plain.

The caramel icing in question is a seven-minute frosting with light brown sugar, white sugar, cream of tartar, salt, and egg whites. If you're lacking a recipe and want this one, shout out and I'll post, or you could pick up a copy of The County Fair Cookbook and turn to page 101. If you do, then be sure and flip the page to read about "The Varmit Roast," and "How To Judge a Country Ham." Hint: Aroma is worth thirty points -- more than any other attribute!

Sunday, August 30, 2009

The Great Raisin Divide: Creamy Rice Pudding

My sister suggested that I hit a different region for each recipe this week, and so today, we'll go to New England. The County Fair Cookbook highlights the Fryeburg Fair, in Fryeburg, Maine. It's held the first week in October containing the first Wednesday in October (wrap your head around that one), and runs for 8 days. It's on Route 5, in western Maine, near the New Hampshire border. October in New England? Go for the foliage, stay for the fair. Evidently, they have the biggest set up for campers after Disney World, so if you feel a need to camp, you're all set.

When I think of "pudding," I tend to think of instant Jell-o pudding. Take powder (chocolate or butterscotch, in my head), take cold milk, beat or shake for two minutes, eat. I have some bad memories of other puddings in hospital cafeterias...tapioca, bread, rice... Thankfully, all of these have been redeemed by eating them, you know, not in hospital cafeterias.
My Grandmother's Creamy Rice Pudding

Rose Robinson, Loretta [Greene]'s grandmother, lived on a small farm in South Paris, Maine. "This is the version as it's been passed down," says Loretta.

Serves 4

1 cup white rice
1 cup cold water
4 cups whole milk
1/2 cup sugar
1/2 teaspoon salt (optional)
1/2 cup raisins (optional)
Few drops lemon extract

1. Boil the rice and water until the water is absorbed.
2. Add the milk, sugar and salt, and the optional raisins. Simmer uncovered over low heat (or on the back of a wood-burning stove) until most of the milk is absorbed and the rice is tender. Stir in the lemon extract.
First of all, the salt is not optional. Salt makes things taste better, folks, and a small amount of salt in your dessert is going to make it taste lovely. It won't taste like a salt lick. It's half a teaspoon, for pity's sake. Use the salt.

Here's where I'll lose some of you, here on the banks of the Great Raisin Divide. The raisins are not optional. Oh, sure, you could substitute some chopped up dried apricots or apples or dates, if you ran out of raisins, but you need the dried fruit in this to make it more than, well, milky rice without raisins. Raisins are nature's candy. Raisins are essential. You will miss it if you don't have the little bit of yielding chewiness.

I know, I know. Some of you hate raisins. I weep for the future, sometimes. But I stand by my beliefs, here on the proper side of the G.R.D. Just as I know the cheese is never optional, the raisins are never optional here at Take One Cookbook.

As for the wood stove reference, evidently Loretta cooks on a wood stove throughout the fair, in a display of old-time farm crafts, and also at home. Yes, by choice.

Saturday, August 29, 2009

The County Fair Cookbook, Lyn Stallworth & Rod Kennedy Jr.: Swiss Cabbage Pie

I was a 4Her from early on. It helps that my dad was an Extension agent, and helped get 4H going in our town; my sister is now the secretary for 4H in that same office. I was part of 4H sewing, cooking, forestry, photography, and rabbits...a lot of clubs! I went to 4H camp (which has mixed memories for me, especially as my first-ever high fever was at camp, and so there are some hallucinations wrapped up in my recollections of the senior counselors). The best part of 4H, though, was The Fair.

Come the third week in August, life moved to Canby. Even before we had 4H projects of our own, we'd go and watch Dad judge the photography. Mom would talk about when she made cookies for her county fair, and ate so much dough she was ill. My sister and I showed our rabbits, had our sewing skills evaluated, demonstrated recipes, and once and a while even thought about going to see the rodeo.

To say I love my county fair -- and, yes, though I've been gone for 19 years, I still think of that as my fair -- is an understatement. So, when I got a happy reminder that, yes, I have a cookbook blog, it was easy to pick a seasonal choice: The County Fair Cookbook by Lyn Stallworth and Rod Kennedy, Jr. (Hyperion, 1994). The book is divided up by region, focusing mainly on the United States but including some Canadian fairs. The recipes represent both their region and the homey comfort of county fairs in general, and are accompanied by loving descriptions of the fairs themselves. There's even a page dedicated to my fair, but we'll get to that later on this week. For now, let's go to the Eureka County Fair, in Eureka, Nevada. The fair runs the first or second week of August, for three days. Just take Route 50 out of Reno.
Swiss Cabbage Pie

"When he was a kid on the ranch, my husband's grandmother took this down to the hayfield around two p.m. as an afternoon snack with coffee," says Ethel. "I collect cookbooks, and when we lived on a ranch I'd find a great-sounding recipe and realize I didn't have most of the ingredients called for. We were seventy-five miles from one town, and a hundred and fourteen miles from another. You learn to substitute. I've created a few new recipes out of necessity."

Serves 6 to 8

1 loaf unbaked bread (can use frozen purchased dough)
1 pound bacon
8 cups shredded cabbage
1/2 teaspoon salt
1/4 teaspoon pepper
3 eggs, beaten
1 1/2 cups cream or half-and-half
1/2 cup grated Swiss cheese (optional)

• Preheat the oven to 350 degrees.
1. Roll out the bread dough about 1/4 inch thick and place it in a 9-inch pie pan. Crimp the edges, as you would a pie.
2. Cut the bacon into small pieces and brown them in a large heavy pot. Pour off all but 1 tablespoon of the grease. Stir in the shredded cabbage and cook over moderate heat, stirring, for 1 minute.
3. Over low heat, add the salt and pepper, eggs, cream and the cheese, if you are using it. Cook for 3 to 4 minutes, stirring. Put the mixture in the crust and bake for 30 minutes, or until the filling is set and the edges are golden brown.

Remember, folks, that in my book, cheese is NEVER optional. Cheese is essential. Also, if you got frozen dough for this, please thaw it according to package directions before starting. Do not try to roll out frozen dough.

You could buy your cabbage pre-shredded in a bag, if you're not keen on deconstructing a head of cabbage on your own. But, as Mary Frances over at the Gluten(-)Free Cooking School shows, it's cheaper, tastier, and just more pleasant to do it yourself. Go on over to GFCS, and see how easy it is. Plus, as Mary Frances says, "After a long day, it’s sometime really fun to hack into a large vegetable with a big, long knife."

My copy of The County Fair Cookbook is massively dog-earred, and I've yet to plot out just which recipes will show up on this blog. So, if you have a favorite fair, let me know, and I'll see if we can get up a recipe from there, or at least from nearby.

Tuesday, June 9, 2009

Picnic Soup #2: Tomato and Buttermilk Soup

I didn't eat/enjoy/recognize avocados as food until after college (Face masks? Sure. Food, no.). If one of your fellow picnickers shares my old hesitation, you're going to have a hard sell with Cold Avocado Soup. Try this alternative, from Outdoor Dining:
Tomato and Buttermilk Soup

2 cups (16 fl oz/500 ml) tomato juice
1 cup (8 fl oz/250 ml) buttermilk

This simple soup is cool and refreshing; if desired you can add some chopped tomato, cucumber, and fresh herbs. You can also vary the proportion of tomato juice to buttermilk.

Combine the tomato juice and buttermilk.

Serve Tomato and Buttermilk Soup chilled with open sandwiches, which become extra special when you make them with savory butters.

Variation: Combine buttermilk and apricot nectar for a refreshing drink.

Serves 2
Two ingredients! Just two! No cutting, no dicing, no blanching, no skinning, no skimming, no heating... it's simple, alright! Other than a glorious opportunity to stain things tomato red, this is something you could easily make with any kid old enough to stir the sugar and Kool-Aid packet in to the 2 quart pitcher.

Or was that just my childhood?

This soup shares a page with lots of savory butter suggestions. Pink peppercorn butter, which is "particularly good" with roast beef. Anchovy butter, for eggs, watercress, or cucumber. Herb butters. Walnut butter. If you can whir it up in a food processor, Outdoor Dining suggests you make it into a compound butter. I actually agree, and was just exhorting my brother in law in Pittsburgh to use some of his bumper crop of tarragon to make a compound butter. Compound butters (savory or sweet) freeze beautifully, and it's great to be able to cut off a hunk of a seasoned butter to melt on your grilled whatever.

Friday, June 5, 2009

Picnic Sandwich #2: Pan Bagnia

As lovely and tangy as the patafla is, it still strikes me as an appetizer sort of sandwich. Heck, the suggested menu from Outdoor Dining for patafla lists it in the appetizer slot. Sometimes, you need something a little heartier on your picnic, and if you're in a sandwich mood, this is just the thing:
Pan Bagnia

6 tablespoons olive oil
4 large slices eggplant (aubergine)
16 French beans
4 bread rolls
8 teaspoons olive oil, extra
2 cloves garlic, finely chopped
parsley, finely chopped
1 red bell pepper (capsicum), cut into strips
12 black olives, pitted
16 slices prosciutto
1 purple (Spanish) onion, thinly sliced, optional

Heat 6 tablespoons of olive oil in a frying pan and fry the eggplant slices until golden brown on each side. Lift out and drain on paper towels.

Cook the beans in boiling water for 5 minutes. Drain.

Cut the bread rolls in half and brush the cut surfaces with extra olive oil.

Sprinkle the bottom half of each bread roll with the garlic and parsley, then add a slice of eggplant to each one. Divide the remaining ingredients, including the beans, between the bread rolls, then join the halves of the bread rolls together.

Wrap each bread roll securely in plastic (cling) wrap, then put all four under a heavy weight (such as a heavy bread board) for about 30 minutes.

Serves 4

Menu
Tomato and Buttermilk Soup (page 93)
Pan Bagnia
Fudge Brownies (page 43)
There is a new French bakery behind the building I work at, and they serve a lauded pan bagnia. We keep talking about going there for lunch. But, oh, how easy it is to put together these weighted sandwiches on your own!

And weighted sandwiches are lovely. The juices mix, the sandwiches hold together well. You can make it without the prosciutto if you want to keep it vegetarian -- goodness knows there's a lot going on with the sandwich -- but I love the melting-on-your-tongue porky goodness the prosciutto brings. If you buy extra, you could always wrap some cantaloupe chunks with it, and serve it as part of a cheese course/dessert.

Chefly Husband has been known to do a version of this sandwich using a large loaf of bread. He calls it a Big Sandwich. I love it, but am charmed by the individual Not So Big nature of these. I'm also charmed with the idea of green beans on a sandwich. It's so very not what I ever did with green beans growing up. Were I to make these, I'd have to have extra beans on hand; our resident Corgi eats green beans with a passion.

Picnic Soup #1: Cold Avocado Soup

I'm going to go see the Indigo Girls at Wolftrap next week, and have been driving everyone around me a bit crazy by my obsessive menu planning. One thing that has stuck, however, was the idea of a cold soup, transported in a growler I got at a beer pub ages ago. I keep saying "a growler of gazpacho!" It took a while to hit on the gazapcho, though, and Outdoor Dining offers two potential growler-fillers. The first:
Cold Avocado Soup

2 avocados, halved and seeds removed
1 small white onion, chopped
2 cups (16 fl oz/500 ml) chicken stock
1 cup (8 fl oz/250 ml) buttermilk
salt and freshly ground black pepper
1 red bell pepper (capsicum), halved
1 teaspoon Tabasco sauce

A rich, cold soup is a lovely start to a summer picnic; it is easy to carry in a large glass jar or vacuum flask.

Scrape the avocado flesh into a food processor or blender. Add the onion and stock and process until smooth.

Pour into a container and stir in the buttermilk and salt and pepper to taste. Put aside until ready to serve.

Put the bell pepper under a broiler (griller) until the skin blackens. Transfer to a paper bag and leave for about 30 minutes. Scrape off the blackened skin. Put the bell pepper into a food processor or blender with the Tabasco and purée. Transfer to a small jar.

To serve, add a dollop of the bell pepper purée to each bowl of avocado soup.

Serves 4

Menu
Cold Avocado Soup
Scallop and Bell Pepper (Capsicum) Salad (page 83)
Cookies
Why is this soup not coming with me to the concert? Frankly, the idea of garnishing on site seems pointlessly fussy. I know, I could just serve the soup sans puree, but...you should see how lovely this soup looks in the picture. Pale green, with a rush of vivid red. It's gorgeous. The soup will have to wait for a time that I'm eating outside...but within steps of the kitchen.

Every single recipe in Outdoor Dining is accompanied by a beautiful full-page photo. André Martin did the food photography, and Donna Hay, the food styling. Together, they make every dish look like something you simply have to try, right this very second. It's worth picking up a copy of the book (used, as it appears to be out of print), as the photos add so much.

I'm heading out of town for a wedding, so will be doubling up today, and when I return.